Dark Chocolate Raspberry Cheesecake Made Easy Recipe
Introduction
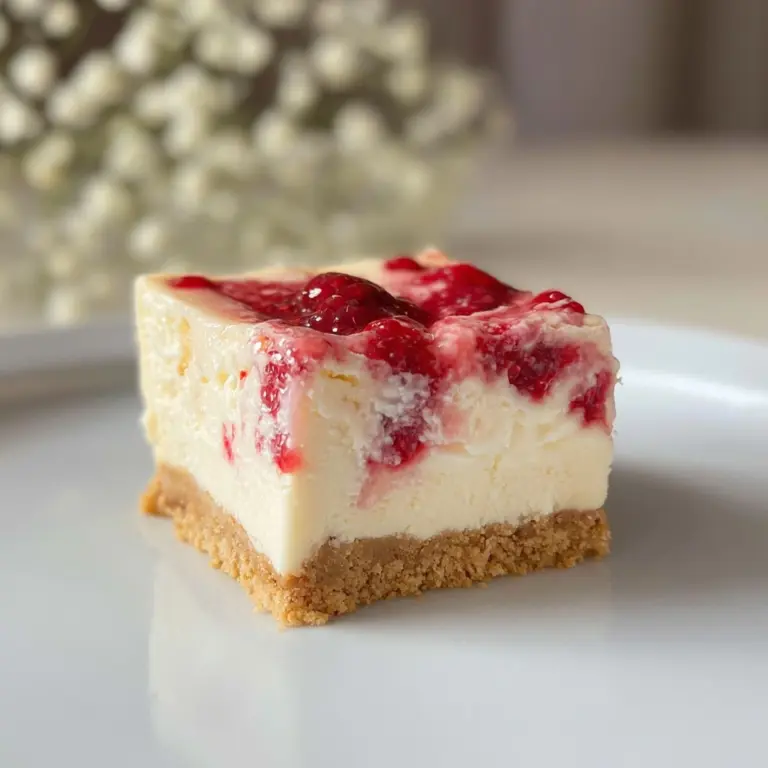
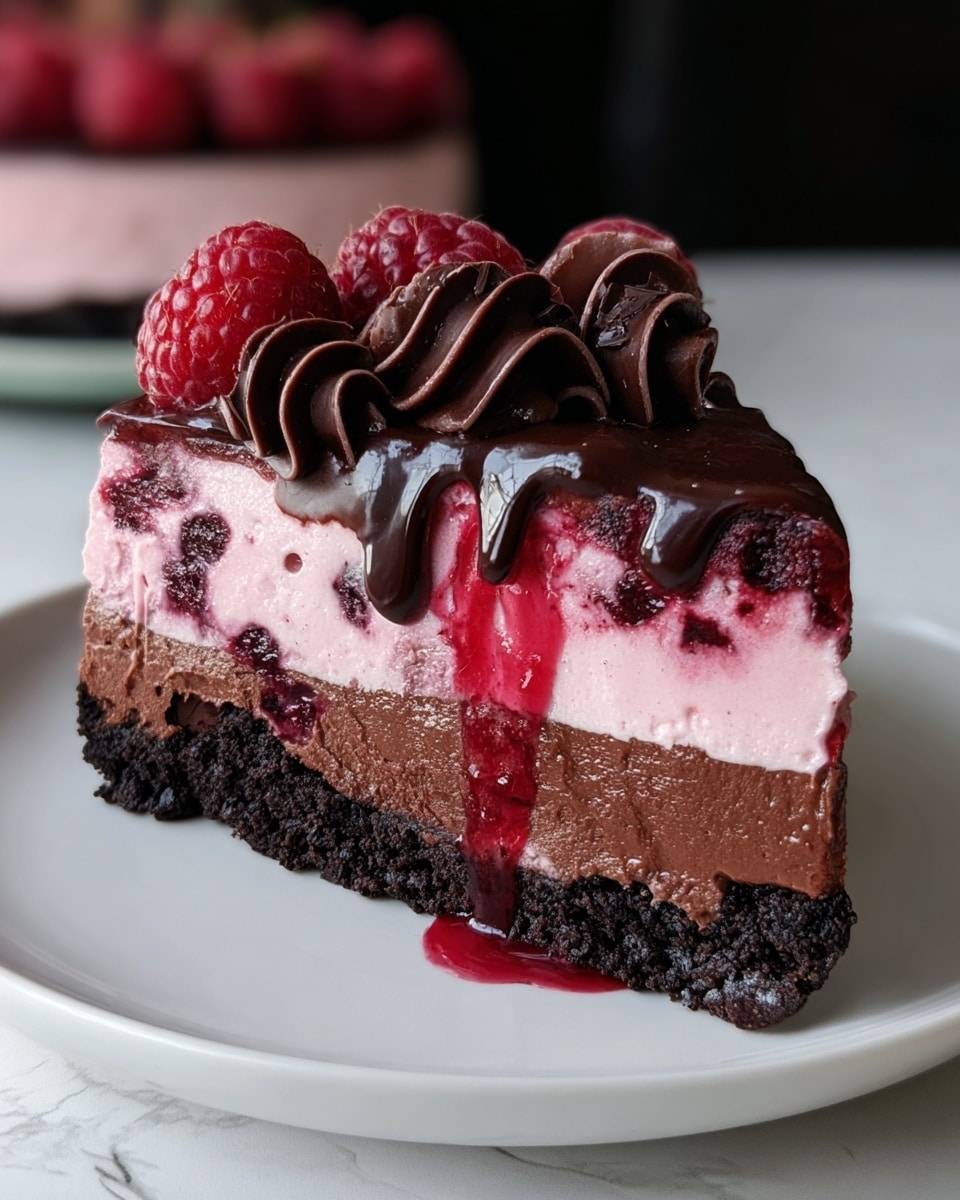
This Dark Chocolate Raspberry Cheesecake is a decadent dessert that combines rich chocolate flavor with the bright tartness of fresh raspberries. With a simple crust and creamy filling, it’s perfect for special occasions or a delightful treat any time.

Ingredients
- 2 cups crushed chocolate cookies (like chocolate graham crackers)
- ¼ cup melted butter
- 24 oz cream cheese, softened
- ½ cup granulated sugar
- ¼ cup melted dark chocolate
- 1 tsp vanilla extract
- 3 large eggs
- ½ cup fresh raspberries
Instructions
- Step 1: Preheat your oven to 325°F (160°C). Lightly grease a 9-inch springform pan, or line the bottom with parchment paper for easy removal.
- Step 2: In a medium bowl, mix the crushed chocolate cookies with melted butter until the texture resembles wet sand. Press the mixture firmly into the bottom of the prepared springform pan to form an even crust. Use the back of a spoon or flat-bottomed glass to help compress the crust tightly.
- Step 3: In a large mixing bowl, beat the softened cream cheese and sugar together until smooth and creamy. Add in the melted dark chocolate and vanilla extract, beating until well incorporated.
- Step 4: Add the eggs one at a time, mixing on low speed after each addition until just combined. Avoid overmixing to prevent cracks during baking.
- Step 5: Gently fold in the fresh raspberries with a spatula. Be careful not to crush them, as you want whole berries scattered throughout the cheesecake for beautiful bursts of flavor.
- Step 6: Pour the cheesecake batter over the prepared crust and smooth the top. Tap the pan gently on the counter to release any air bubbles.
- Step 7: Bake in the preheated oven for 60 minutes, or until the center is mostly set but still slightly jiggly. The cheesecake will continue to firm up as it cools.
- Step 8: Remove from the oven and let the cheesecake cool to room temperature. Then refrigerate for at least 4 hours, or preferably overnight, to allow it to fully set.
- Step 9: Before serving, you can top with additional fresh raspberries, a drizzle of melted chocolate, or a dusting of powdered sugar for an elegant finish.
Tips & Variations
- For a smoother crust, pulse cookies in a food processor until finely ground. You can also substitute chocolate wafer cookies for a slightly different texture.
- Use high-quality dark chocolate for a richer flavor in the filling, and melt it gently over a double boiler to avoid burning.
- If fresh raspberries are not available, frozen ones can be used, but be sure to thaw and drain them well to avoid excess moisture.
- To prevent cracking on top, consider baking the cheesecake in a water bath or placing a pan of water in the oven to maintain humidity.
Storage
Store the cheesecake covered in the refrigerator for up to 4 days. For longer storage, wrap tightly and freeze for up to 2 months. Thaw in the refrigerator overnight before serving. Reheat slices gently in the microwave if desired, but cheesecake is often best enjoyed chilled.
How to Serve
Serve this delicious recipe with your favorite sides.
FAQs
Can I use a different type of cookie for the crust?
Yes, you can use chocolate wafers, Oreos (without filling), or chocolate graham crackers. Just make sure they are crushed finely for a good crust texture.
How do I prevent cracks on top of the cheesecake?
Avoid overmixing the batter and bake at a low temperature. Using a water bath or placing a pan of water in the oven can help maintain moisture and reduce cracking.
PrintDark Chocolate Raspberry Cheesecake Made Easy Recipe

This Dark Chocolate Raspberry Cheesecake is a luscious and easy-to-make dessert combining a rich chocolate cookie crust with a creamy dark chocolate-infused cheesecake filling studded with fresh raspberries. Perfectly baked to a smooth finish and chilled for a refreshing treat, it offers a delightful balance of tart and sweet flavors ideal for any occasion.
- Prep Time: 20 mins
- Cook Time: 60 mins
- Total Time: 4 hrs 20 mins (including chilling time)
- Yield: 8 servings 1x
- Category: Dessert
- Method: Baking
- Cuisine: American
Ingredients
The Crust:
- 2 cups crushed chocolate cookies (like chocolate graham crackers)
- ¼ cup melted butter
The Filling:
- 24 oz cream cheese, softened
- ½ cup granulated sugar
- ¼ cup melted dark chocolate
- 1 tsp vanilla extract
- 3 large eggs
- ½ cup fresh raspberries
Instructions
- Preheat the Oven: Preheat your oven to 325°F (160°C). Lightly grease a 9-inch springform pan, or line the bottom with parchment paper for easy removal.
- Make the Crust: In a medium bowl, mix the crushed chocolate cookies with melted butter until the texture resembles wet sand. Press the mixture firmly into the bottom of the prepared springform pan to form an even crust. Use the back of a spoon or flat-bottomed glass to help compress the crust tightly.
- Prepare the Cheesecake Batter: In a large mixing bowl, beat the softened cream cheese and sugar together until smooth and creamy. Add in the melted dark chocolate and vanilla extract, beating until well incorporated.
- Add the Eggs: Add the eggs one at a time, mixing on low speed after each addition until just combined. Avoid overmixing to prevent cracks during baking.
- Fold in Raspberries: Gently fold in the fresh raspberries with a spatula. Be careful not to crush them, as you want whole berries scattered throughout the cheesecake for beautiful bursts of flavor.
- Assemble and Bake: Pour the cheesecake batter over the prepared crust and smooth the top. Tap the pan gently on the counter to release any air bubbles. Bake in the preheated oven for 60 minutes, or until the center is mostly set but still slightly jiggly. The cheesecake will continue to firm up as it cools.
- Cool and Chill: Remove from the oven and let the cheesecake cool to room temperature. Then refrigerate for at least 4 hours, or preferably overnight, to allow it to fully set.
- Serve and Enjoy: Before serving, you can top with additional fresh raspberries, a drizzle of melted chocolate, or a dusting of powdered sugar for an elegant finish.
Notes
- Ensure cream cheese is softened to room temperature for a smooth batter without lumps.
- Be careful not to overmix the batter after adding eggs to prevent cracking during baking.
- Use fresh raspberries gently folded into the batter to keep them intact and avoid bleeding color.
- Allow the cheesecake to chill thoroughly to achieve the best texture and clean slices.
- For easier removal, line the bottom of the springform pan with parchment paper.
- Store leftovers refrigerated and consume within 3-4 days for optimal freshness.
Keywords: dark chocolate cheesecake, raspberry cheesecake, chocolate raspberry dessert, baked cheesecake, easy cheesecake recipe