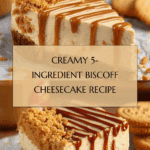
Biscoff Cheesecake {5 Ingredient Recipe!} Recipe
If you are a fan of rich, creamy desserts with a hint of warm caramelized spice, then I have the perfect treat for you: the Biscoff Cheesecake {5 Ingredient Recipe!}. This cheesecake is a delightful blend of smooth cream cheese, luscious Biscoff spread, and a crunchy biscuit base that together create an irresistibly comforting dessert. What’s truly wonderful is how minimal ingredients deliver maximum flavor, making it a quick yet impressive showstopper for any occasion. Trust me, once you try this Biscoff Cheesecake {5 Ingredient Recipe!}, it will become your new favorite dessert to whip up — simple, scrumptious, and utterly satisfying.
Ingredients You’ll Need
The wonderful thing about the Biscoff Cheesecake {5 Ingredient Recipe!} is how straightforward and accessible the ingredients are. Each one plays an important role, whether it’s the buttery crunch of the base or the velvety creaminess of the filling, all coming together to create a perfectly balanced dessert.
- Biscoff biscuits, 200 g (7 oz) crushed: These give you the iconic spiced crunch in the crust, packing in that caramelized flavor right from the start.
- Unsalted butter, 80 g (3 oz) melted: Butter binds the biscuit crumbs together and adds richness to the base’s texture.
- Double cream, 300 ml (1.25 cups): Whipped to thick perfection, it adds a light and airy dimension to the cheesecake filling.
- Full fat cream cheese, 400 g (14 oz): Creamy and smooth, it forms the luscious foundation of the cheesecake’s body.
- Biscoff spread, 200 g (7 oz) for the filling plus 150 g (5 oz) melted for topping: The star flavor of this recipe, infusing both the filling and topping with its unique spiced caramel charm.
- Biscoff biscuits, 50 g (2 oz) crushed for topping: Adds a delightful textural contrast and finishes the cheesecake with style.
How to Make Biscoff Cheesecake {5 Ingredient Recipe!}
Step 1: Prepare the Biscuit Base
Start by combining the crushed Biscoff biscuits with the melted unsalted butter. This mixture becomes your cheesecake’s crispy, flavorful foundation. Press it firmly into the base of your tin to ensure it holds together well later on. Pop it into the fridge to chill — this helps it set while you move on to the creamy filling.
Step 2: Whip Up the Cheesecake Filling
Next, take a bowl and pour in the double cream, then add your full fat cream cheese and Biscoff spread. Whisk everything together vigorously until the mixture is thick and creamy, resembling a soft ice cream consistency. Using an electric whisk will save you some effort and speed up the process. This step is where the magic happens as the filling becomes luxuriously smooth with that unmistakable Biscoff flavor.
Step 3: Assemble and Chill
Retrieve your biscuit base from the fridge and carefully spoon in your cheesecake mixture, smoothing the surface evenly. Now, the hardest part is waiting! Pop the whole tin back into the fridge for at least 3 hours to let it set. If you can plan ahead, overnight chilling makes the texture even creamier and easier to slice.
Step 4: Add the Decorative Biscoff Topping
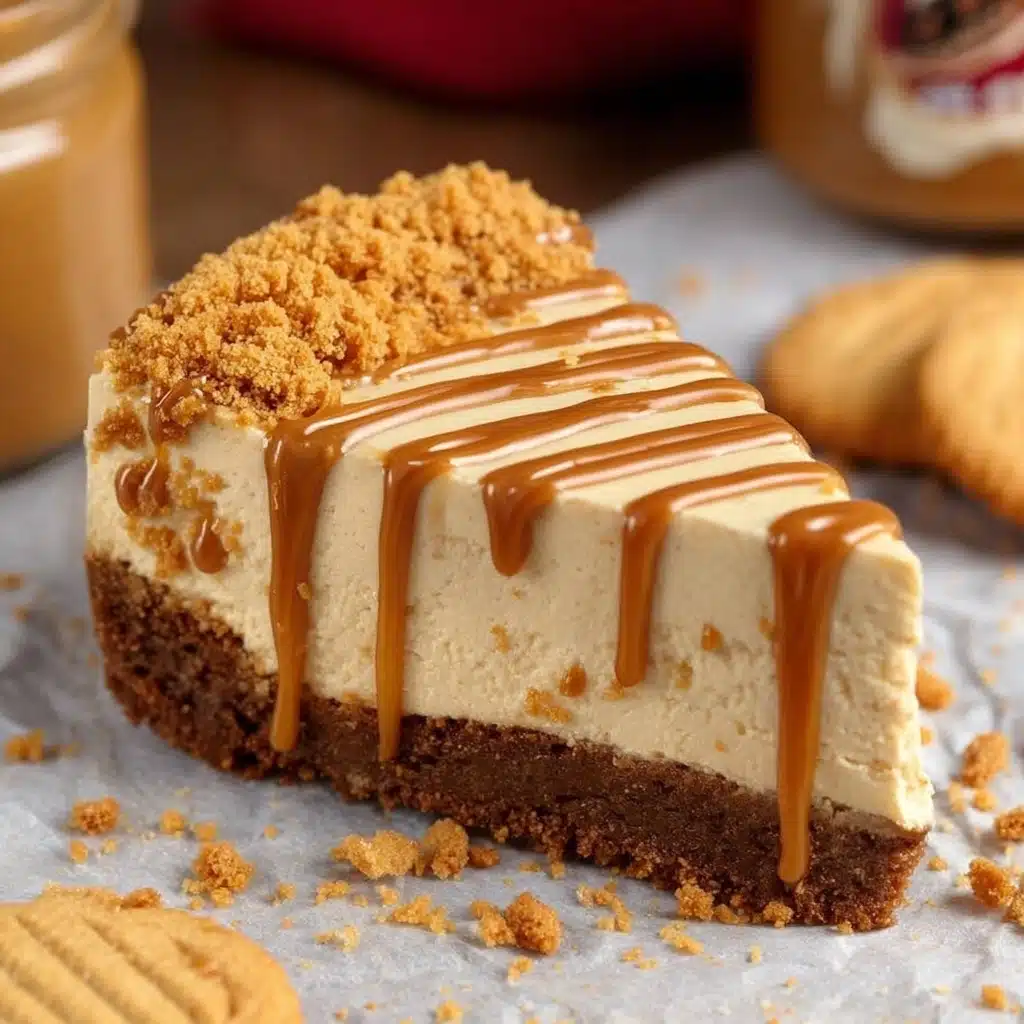
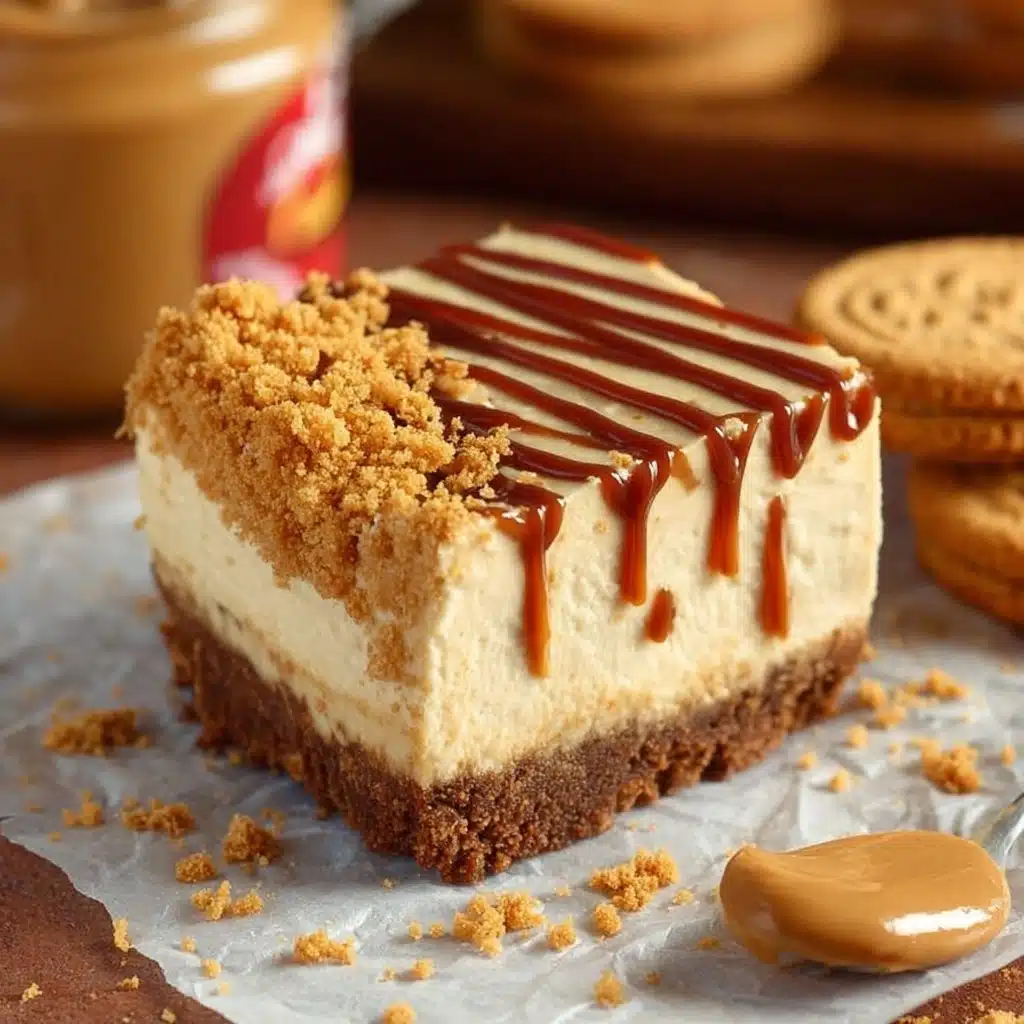
When you’re ready to serve, gently melt the remaining Biscoff spread in a pan over low heat – be careful not to let it get too hot or bubble. Pour this melted topping evenly over the chilled cheesecake and smooth it gently with the back of a spoon for a glossy finish. Finally, sprinkle the last bit of crushed Biscoff biscuits around the edge to add a wonderful crunch and make it look irresistible.
Step 5: Final Chill and Serve
Put your cheesecake back in the fridge for at least one more hour to set the topping nicely. The longer you wait, the neater the slices will be when you cut it. Then slice, serve, and savor every dreamy spoonful of your homemade Biscoff Cheesecake {5 Ingredient Recipe!}.
How to Serve Biscoff Cheesecake {5 Ingredient Recipe!}
Garnishes
This cheesecake is striking enough on its own, but adding a few extra garnishes can elevate the experience. A sprinkle of crushed Biscoff biscuits on top adds texture, while a few dollops of whipped cream around the edges can lend creaminess and charm. For an elegant twist, consider adding a light drizzle of caramel or a handful of toasted nuts for crunch and contrast.
Side Dishes
Serve your cheesecake alongside fresh berries or a tangy berry compote to cut through the sweetness and brighten each bite. A cup of rich coffee or a spiced chai pairs beautifully with the warm flavors of Biscoff. You might also enjoy it with a scoop of vanilla ice cream for an utterly indulgent dessert experience.
Creative Ways to Present
For a personal touch, try making mini Biscoff cheesecakes in individual jars or ramekins — perfect for parties or gifts. Layer with crushed biscuits and cheesecake filling for a parfait style dessert. You can also experiment by swirling melted Biscoff spread into the filling for a marbled effect or adding edible gold leaf for a glam finish. Presentation can be simple or fancy, either way it’s bound to impress.
Make Ahead and Storage
Storing Leftovers
Keep any leftover Biscoff Cheesecake {5 Ingredient Recipe!} covered in the fridge, ideally in an airtight container, for up to 3 days. This will help maintain the creamy texture and keep the buttery biscuit base crisp without absorbing fridge odors.
Freezing
You can freeze this cheesecake if you need to prepare well in advance. Wrap it tightly with cling film and aluminum foil to protect it from freezer burn. Freeze for up to 1 month. When ready to enjoy, thaw it overnight in the fridge for the best texture.
Reheating
This is a no-bake cheesecake that is best enjoyed cold. Avoid reheating as it could spoil the delicate texture of the cream cheese filling and cause the topping to melt unevenly. Instead, let frozen or chilled slices come to room temperature for 10-15 minutes before serving for optimal creaminess.
FAQs
Can I use regular cream cheese instead of full fat?
While you could use lighter cream cheese, full fat gives you that classic rich and creamy cheesecake texture that balances perfectly with the Biscoff flavors. The lighter versions tend to be less smooth and might alter the firmness.
Do I have to use double cream?
Double cream is key for whipping up that thick, airy texture in the filling. If you substitute with single cream, the filling might not set as well and could turn out runnier, so double cream is highly recommended for best results.
Can I make this cheesecake vegan?
Since this recipe heavily relies on dairy products and Biscoff spread, which may contain milk, making a vegan version would require substitutions like vegan cream cheese, coconut cream, and a plant-based Biscoff-style spread. It’s doable but would change the flavor profile quite a bit.
Why should I chill the base before adding the filling?
Chilling helps the butter solidify again, which sets the biscuit base firmly. This prevents it from crumbling or mixing with the filling and ensures you get clean slices with a crisp bottom layer.
Can I use a different biscuit for the base?
Sure! While Biscoff biscuits give the signature caramel-spiced flavor, you could experiment with graham crackers, digestive biscuits, or ginger snaps. Just keep in mind the flavor will vary and might not be quite the same as the classic Biscoff Cheesecake {5 Ingredient Recipe!} you love.
Final Thoughts
I cannot recommend enough giving this Biscoff Cheesecake {5 Ingredient Recipe!} a try — it’s such a simple recipe that delivers big on taste and texture. Whether for a special occasion or a cozy weekend treat, it comes together quickly and looks spectacular. Trust me, your friends and family will be asking for seconds before you know it. So grab those five simple ingredients and enjoy making your new favorite dessert today!
PrintBiscoff Cheesecake {5 Ingredient Recipe!} Recipe

This indulgent Biscoff Cheesecake is a simple 5-ingredient no-bake dessert that combines the rich flavors of Biscoff biscuits and spread with creamy full-fat cream cheese and double cream. Perfect for Biscoff lovers, this cheesecake features a crunchy biscuit base, a velvety smooth cheesecake filling, and a luscious Biscoff topping garnished with more crushed biscuits for added texture. Ideal for a make-ahead dessert that’s guaranteed to impress.
- Prep Time: 20 minutes
- Cook Time: 0 minutes
- Total Time: 4 hours 20 minutes (including chilling time)
- Yield: 8 servings 1x
- Category: Dessert
- Method: No-bake, chilling
- Cuisine: British
- Diet: Vegetarian
Ingredients
For the Base:
- 200 g (7 oz) Biscoff biscuits, crushed
- 80 g (3 oz) unsalted butter, melted
For the Cheesecake Mixture:
- 300 ml (1.25 cups) double cream
- 400 g (14 oz) full-fat cream cheese
- 200 g (7 oz) Biscoff spread
For the Topping:
- 150 g (5 oz) Biscoff spread, melted
- 50 g (2 oz) Biscoff biscuits, crushed
Instructions
- Prepare the base: Combine the crushed Biscoff biscuits with the melted unsalted butter until the mixture resembles wet sand. Press this mixture firmly and evenly into the base of a springform tin or a similar cake tin. Place the tin in the fridge to chill and set while you prepare the cheesecake filling.
- Make the cheesecake mixture: In a large mixing bowl, pour in the double cream, then add the full-fat cream cheese and Biscoff spread. Using an electric whisk, beat the ingredients together until the mixture thickens significantly, reaching a consistency similar to soft ice cream. This ensures a smooth, creamy texture for your cheesecake layer.
- Assemble the cheesecake: Remove the biscuit base from the fridge. Pour the thickened cheesecake mixture over the chilled base, spreading it out evenly and smoothing the top with a spatula to create a flat surface.
- Chill the cheesecake: Place the assembled cheesecake back into the fridge and chill for at least 3 hours to allow it to set properly. For best results and optimal texture, leave it chilling overnight if time permits.
- Prepare the topping: Just before serving, gently melt the 150 g of Biscoff spread in a small pan over low heat. Take care to keep the heat low to avoid overheating or burning the spread—it should become just runny enough to pour easily.
- Add the topping: Remove the cheesecake from the fridge. While still in the tin, slowly pour the melted Biscoff spread over the top of the cheesecake. Using the back of a spoon, carefully spread the topping evenly across the surface, avoiding any contact with the soft cheesecake mixture to maintain a clean finish.
- Garnish and final chill: Sprinkle the remaining 50 g of crushed Biscoff biscuits evenly around the edge of the cheesecake to add a crunchy contrast. Return the cheesecake to the fridge and chill for at least another hour to allow the topping to set completely. Although you can cut the cheesecake sooner, waiting ensures neat slices and better texture.
Notes
- Use full-fat cream cheese and double cream for the creamiest texture and richest flavor.
- Electric whisking helps achieve the perfect thick consistency in the cheesecake mixture.
- Chilling the cheesecake overnight results in a firmer set and enhanced flavors.
- Be cautious when melting the Biscoff spread; low and slow heat prevents it from burning or separating.
- This cheesecake is best stored in the fridge and should be consumed within 3 days for optimal freshness.
- For a nut-free version, ensure your Biscoff spread and biscuits are processed in a nut-free facility or substitute accordingly.
Nutrition
- Serving Size: 1 slice (1/8 of cheesecake)
- Calories: 460 kcal
- Sugar: 30 g
- Sodium: 180 mg
- Fat: 36 g
- Saturated Fat: 20 g
- Unsaturated Fat: 14 g
- Trans Fat: 0.5 g
- Carbohydrates: 29 g
- Fiber: 1.5 g
- Protein: 6 g
- Cholesterol: 115 mg
Keywords: Biscoff cheesecake, no-bake cheesecake, Biscoff dessert, easy cheesecake recipe, 5 ingredient cheesecake