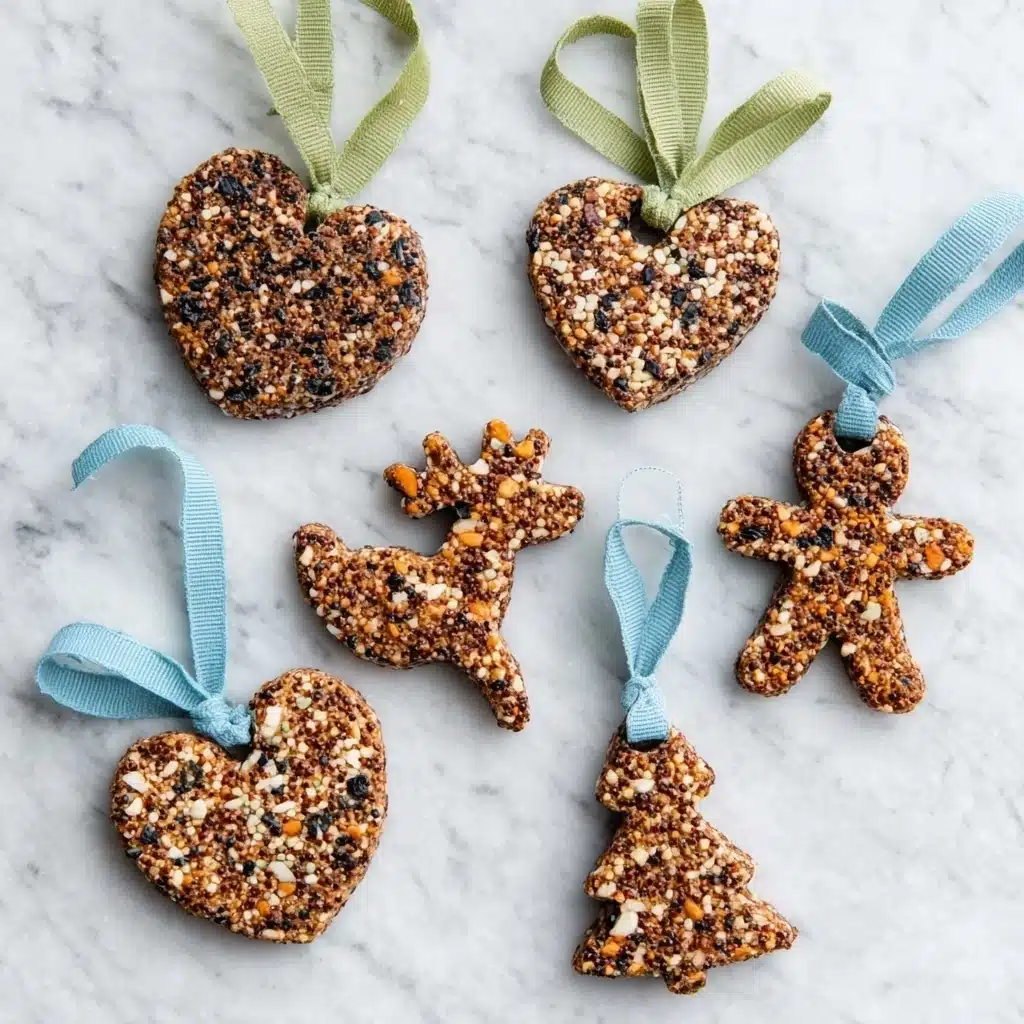
Bird Feeder Craft Recipe
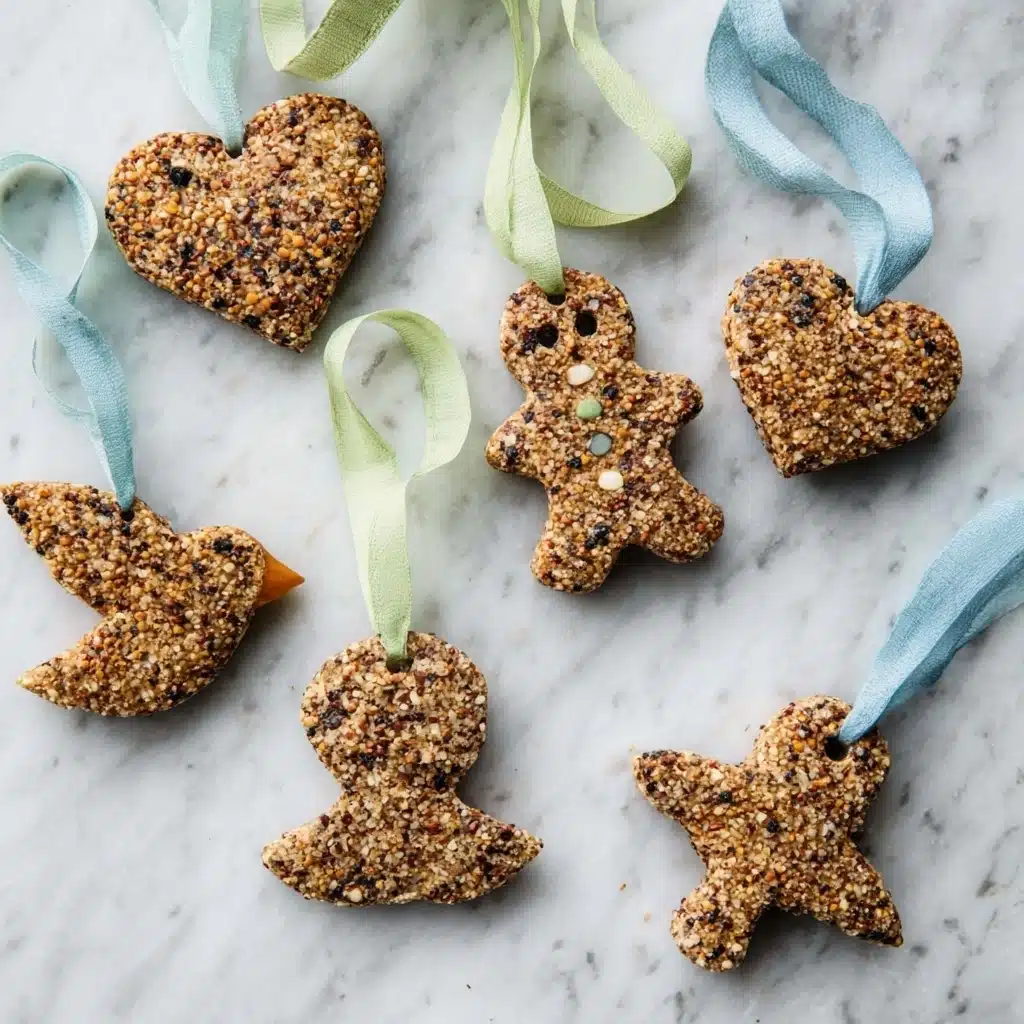
If you love bringing a little more nature’s charm to your backyard, the Bird Feeder Craft is an absolute delight to make and share. This simple, hands-on project transforms everyday ingredients into beautiful, bird-friendly feeders that attract a variety of wild birds right to your window. Each feeder is not only a fun craft but also a thoughtful way to support local wildlife while adding a splash of natural beauty to your outdoor space.
Ingredients You’ll Need
The wonderful thing about this Bird Feeder Craft is how straightforward and minimal the ingredients are. Each one plays a vital role in ensuring your feeder holds together well, looks beautiful, and attracts hungry birds with the perfect mix of nutrition and texture.
- 2-3 cups wild bird feed: This is the core of your feeder, packed with seeds and grains birds love and will happily snack on.
- 1 cup water (divided): Water helps dissolve the gelatin and bind the bird feed into a sturdy mix that sets perfectly.
- 4 to 5 packets clear gelatin (0.25 ounces each): Gelatin acts as the glue, giving your feeder shape and firmness once cooled.
How to Make Bird Feeder Craft
Step 1: Prepare Your Workspace
Start by lining a cookie sheet with parchment paper, then place your cookie cutters on top. Spraying the interior of the cookie cutters with cooking spray ensures your feeders won’t stick, making removal a breeze later on.
Step 2: Mix the Bird Feed and Gelatin
In a large glass bowl, pour the wild bird feed and set it aside while you prepare the gelatin. In a medium bowl, add half the water and sprinkle the gelatin over it. Whisk gently to combine. Heat the remaining water until boiling, then whisk it into the gelatin mix until fully dissolved. Pour this warm gelatin mixture over the bird feed and stir until the seeds absorb all the liquid.
Step 3: Cool and Set the Mixture
Pop the bird feed mixture into the fridge for about 5 minutes. This cooling step lets the gelatin start to firm up, making the mixture easier to handle for shaping.
Step 4: Shape Your Feeders Using Cookie Cutters
Cut drinking straws into 3-inch sections—you’ll use these to create holes for hanging ribbon later. Firmly press the cooled bird feed mixture into each cookie cutter on the parchment-lined sheet. Insert a straw about half an inch from the top, pushing it down to the cookie sheet to make a neat hole for threading. This step is crucial for turning your craft into a functional bird feeder.
Step 5: Refrigerate to Solidify
Place the entire cookie sheet in the fridge for at least 8 hours or overnight. This extended chilling helps your Bird Feeder Craft hold its shape beautifully once removed from the molds.
Step 6: Remove Cutters and Straws
Carefully take the cookie cutters off, then gently press the straws through the holes to clear any filler that might block your ribbon’s path. You want those holes neat and open for easy hanging.
Step 7: Add Ribbon and Dry
Cut your ribbon to the desired length and thread it through the prepared holes. Tie a secure knot to form a loop for hanging. For best results, let your Bird Feeder Craft air dry indoors for 24 hours before placing it outside. This drying time ensures a firm, long-lasting feeder.
How to Serve Bird Feeder Craft
Garnishes
While this craft isn’t a dish to plate, adding small decorative touches like natural twine bows or small pinecone accents can make your feeders extra charming. These thoughtful garnishes create a welcoming invitation for feathered friends while enhancing the aesthetic appeal in your outdoor space.
Side Dishes
Pair your Bird Feeder Craft with a cozy bird-watching spot. A nearby bench with a pair of binoculars or a notepad for bird-spotting can transform your backyard into an interactive nature observation area—perfect for all ages and a wonderful way to connect with the environment.
Creative Ways to Present
Hang multiple Bird Feeder Crafts at varying heights from tree branches, porch railings, or garden hooks. Consider grouping different shaped feeders together for a whimsical look that attract diverse bird species. Using colorful ribbons can also brighten up the view and make your feeders easy to spot from inside your home.
Make Ahead and Storage
Storing Leftovers
If you make more feeders than you can hang right away, store them in a cool, dry place away from direct sunlight. Keeping them on parchment paper in an airtight container helps maintain their shape and prevents moisture buildup that could cause them to soften prematurely.
Freezing
Freezing isn’t recommended for Bird Feeder Craft since the gelatin and bird feed mixture could lose texture and firmness after thawing. It’s best to enjoy your feeders fresh from the fridge after the initial set and drying period.
Reheating
Since these are handcrafted outdoors feeders, reheating doesn’t apply here. Instead, focus on making fresh batches as needed to keep your bird visitors happy and coming back for more.
FAQs
Can I use different shapes for the feeder?
Absolutely! Any cookie cutter shape works for the Bird Feeder Craft. Pick fun shapes like stars, hearts, or circles to add personality to your feeders and appeal to various bird species.
What type of bird seed is best?
Wild bird feed is a great all-around option because it contains a mix of seeds that attract a variety of birds. You can also customize by choosing seeds popular in your area for even better results.
How long do these feeders last outside?
Depending on weather conditions and bird activity, your feeders can last several weeks. Dry weather helps them stay intact longer; if it gets wet often, they might soften sooner but will still provide nourishment while they last.
Is it safe for birds to eat these feeders?
Yes! The ingredients are completely safe and commonly found in natural bird diets. The gelatin is non-toxic and only helps hold everything together without affecting the birds negatively.
Can kids make this Bird Feeder Craft?
Definitely. This project is great for kids with some adult supervision, especially when handling hot water and cutting straws. It’s a fun, educational activity that teaches patience and care for wildlife.
Final Thoughts
There is something truly magical about watching wild birds pause to enjoy a treat you made yourself, and the Bird Feeder Craft is the perfect way to invite that magic into your life. Simple, rewarding, and endlessly charming, this craft connects you with nature and lets you give back in a playful, creative way. Go ahead and make a few—your feathered friends will be so grateful, and your backyard will never look the same!
PrintBird Feeder Craft Recipe
Create a charming and functional bird feeder using simple ingredients like wild bird seed and gelatin. This easy craft project uses cookie cutters for fun shapes, making it a perfect DIY project for bird lovers and families looking to attract wild birds to their garden.
- Prep Time: 15 mins
- Cook Time: 8 hrs (refrigeration and setting time)
- Total Time: 8 hrs 15 mins plus 24 hrs air drying
- Yield: 4 to 6 bird feeders depending on size of cookie cutters 1x
- Category: Craft/DIY
- Method: Refrigeration and molding
- Cuisine: N/A
- Diet: Vegan
Ingredients
Bird Feeder Ingredients
- 2 to 3 cups wild bird feed
- 1 cup water, divided
- 4 to 5 packets clear gelatin (0.25 ounces each)
Instructions
- Prepare Cookie Sheet: Line a cookie sheet with parchment paper. Arrange cookie cutters on the sheet and spray the inside of each cutter lightly with cooking spray to prevent sticking.
- Mix Bird Feed: Place 2 to 3 cups of wild bird seed in a large glass bowl and set it aside.
- Prepare Gelatin: Pour half the water into a medium glass bowl and sprinkle the gelatin powder over it, whisking to combine. Heat the remaining water until boiling and whisk it into the gelatin mixture until fully dissolved and smooth.
- Combine Mixtures: Pour the gelatin mixture into the bowl with bird feed and mix well until the seeds absorb the liquid. Refrigerate the mixture for 5 minutes to let it start setting and cool down.
- Form Bird Feeders: Cut straws into 3-inch pieces. Spoon the bird feed mixture into each cookie cutter, pressing firmly to compact. Insert a straw about ½ inch from the top through the mixture and cookie cutter to create a hole for hanging.
- Refrigerate: Place the cookie sheet into the refrigerator for at least 8 hours or overnight to fully set the bird feeders.
- Remove Cookie Cutters: Gently take off the cookie cutters once the feeders have set solidly.
- Clear Holes: Remove the straws and press through the holes to make sure they are clear and ready for ribbon threading.
- Attach Ribbon: Cut ribbons to desired length and thread through each hole. Tie knots securely to create loops for hanging.
- Dry: Allow the bird feeders to air dry indoors for 24 hours to harden fully before hanging outdoors.
- Hang and Enjoy: Hang your homemade bird feeders outside and watch as your feathered friends enjoy their treats.
Notes
- Use clear gelatin for the best appearance and to avoid affecting bird seed taste.
- Ensure the straws create a clean hole for easy ribbon threading.
- Allow sufficient drying time for the feeders to harden and hold shape outdoors.
- Choose cookie cutter shapes that are large enough to hold ample bird seed.
- Be gentle when removing cookie cutters and straws to prevent breaking feeders.
- For best results, hang feeders in shaded or covered areas to prolong their durability.
Nutrition
- Serving Size: 1 bird feeder (approximate)
- Calories: 150
- Sugar: 0g
- Sodium: 10mg
- Fat: 2g
- Saturated Fat: 0.3g
- Unsaturated Fat: 1.5g
- Trans Fat: 0g
- Carbohydrates: 30g
- Fiber: 4g
- Protein: 5g
- Cholesterol: 0mg
Keywords: bird feeder, DIY bird feeder, bird seed craft, gelatin bird feeder, homemade bird feeder, wildlife craft, garden bird feeder