Mother’s Day Pink Velvet Cake Recipe
Introduction
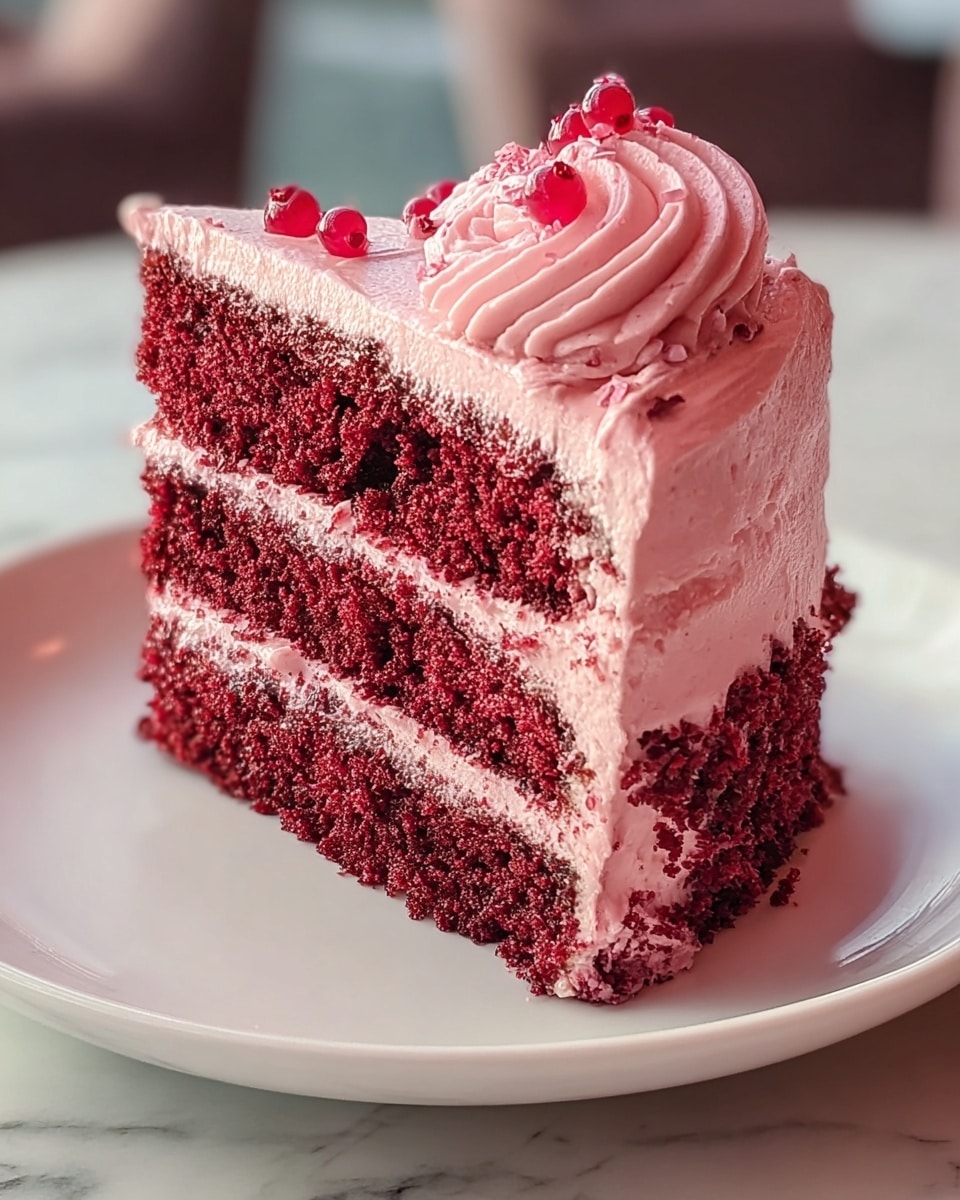
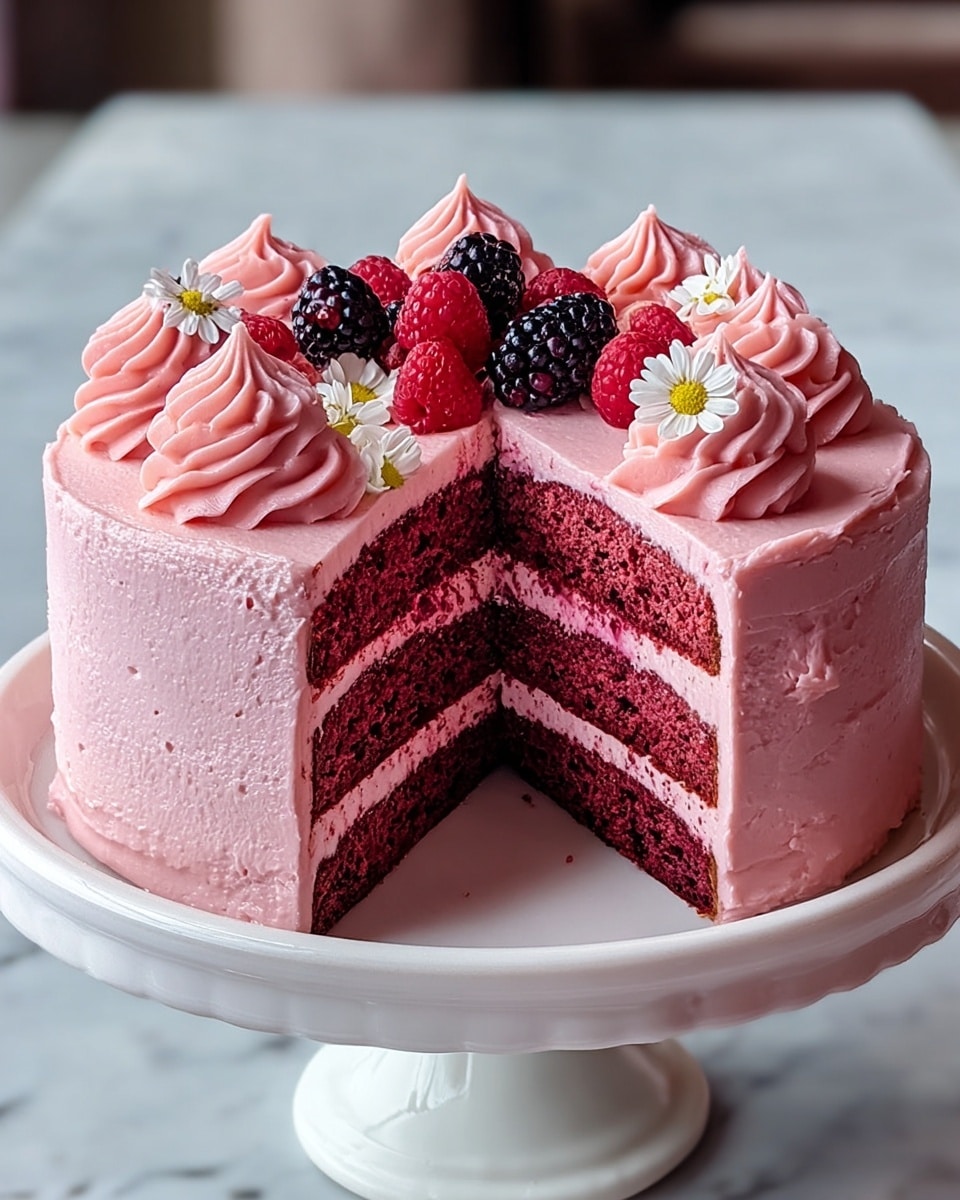
This Mother’s Day Pink Velvet Cake is a delightful twist on the classic red velvet, featuring a soft pink hue and a tender crumb. Moist and rich, it’s perfectly topped with creamy, tangy cream cheese frosting to make any celebration extra special.
Ingredients
- 2 ½ cups cake flour
- 1 ¾ cups granulated sugar
- ½ cup unsweetened cocoa powder
- 1 tbsp baking powder
- ½ tsp salt
- ¾ cup unsalted butter, softened
- 4 large eggs (room temperature)
- 1 cup buttermilk
- 2 tsp pure vanilla extract
- Red food coloring (to achieve desired pink hue)
- Cream cheese frosting (for topping)
Instructions
- Step 1: Preheat the oven to 350°F (175°C). Grease and flour two 9-inch round cake pans to prevent sticking.
- Step 2: In a medium bowl, whisk together the cake flour, cocoa powder, baking powder, and salt until well combined.
- Step 3: In a separate large bowl, cream the softened butter and granulated sugar together using a mixer until the mixture is light and fluffy, about 3 minutes.
- Step 4: Beat in the eggs one at a time, ensuring each egg is fully incorporated before adding the next.
- Step 5: Add the buttermilk, vanilla extract, and red food coloring to the wet mixture and mix until combined and smooth.
- Step 6: Gradually fold the dry ingredients into the wet ingredients until the batter is smooth and uniform in color.
- Step 7: Divide the batter evenly between the two prepared cake pans. Bake in the preheated oven for 25-30 minutes, or until a toothpick inserted in the center comes out clean.
- Step 8: Let the cakes cool in the pans for 10 minutes, then transfer them to wire racks to cool completely before frosting.
- Step 9: Once cooled, frost the cakes generously with cream cheese frosting and serve.
Tips & Variations
- Use room temperature ingredients for even mixing and a better texture.
- Adjust the amount of red food coloring to reach your preferred shade of pink without overpowering the flavor.
- For added flavor, try folding in a teaspoon of instant coffee granules with the dry ingredients to enhance the cocoa taste.
- Swap cream cheese frosting for a mascarpone frosting for a richer, slightly less sweet topping.
Storage
Store the cake covered in an airtight container or wrapped tightly in plastic wrap in the refrigerator for up to 4 days. Let it come to room temperature before serving for the best texture and flavor. You can also freeze the unfrosted cake layers wrapped well for up to 2 months; thaw overnight in the refrigerator before frosting.
How to Serve
Serve this delicious recipe with your favorite sides.
FAQs
Can I use regular milk instead of buttermilk?
Yes, buttermilk adds acidity that helps tenderize the cake and enhance flavor. If you don’t have buttermilk, you can make a substitute by adding 1 tablespoon of lemon juice or white vinegar to 1 cup of regular milk and letting it sit for 5 minutes before using.
How can I make this cake vegan or dairy-free?
To make this cake vegan, substitute the butter with a plant-based margarine and use a flax or chia egg replacement (1 tablespoon ground flaxseed or chia seeds mixed with 3 tablespoons water per egg). Replace buttermilk with a plant-based milk mixed with acid, and use vegan cream cheese frosting alternatives for topping.
PrintMother’s Day Pink Velvet Cake Recipe

Celebrate Mother’s Day with this delightful Pink Velvet Cake, a moist and tender cake featuring a hint of cocoa and a vibrant pink hue. Topped with creamy, tangy cream cheese frosting, this cake is perfect for showing your love and appreciation.
- Prep Time: 20 minutes
- Cook Time: 30 minutes
- Total Time: 50 minutes
- Yield: 12 servings 1x
- Category: Dessert
- Method: Baking
- Cuisine: American
Ingredients
Dry Ingredients
- 2 ½ cups cake flour
- ½ cup unsweetened cocoa powder
- 1 tbsp baking powder
- ½ tsp salt
Wet Ingredients
- ¾ cup unsalted butter, softened
- 1 ¾ cups granulated sugar
- 4 large eggs (room temperature)
- 1 cup buttermilk
- 2 tsp pure vanilla extract
- Red food coloring (to achieve desired pink hue)
Frosting
- Cream cheese frosting (for topping)
Instructions
- Preheat oven and prepare pans: Preheat your oven to 350°F (175°C). Grease and flour two 9-inch round cake pans to prevent sticking and ensure easy release after baking.
- Mix dry ingredients: In a medium bowl, whisk together the cake flour, unsweetened cocoa powder, baking powder, and salt. This ensures even distribution of leavening agents and cocoa.
- Cream butter and sugar: In a separate large bowl, cream the softened unsalted butter with granulated sugar until the mixture is light, fluffy, and pale in color. This usually takes about 3 minutes using an electric mixer.
- Add eggs: Beat in the eggs one at a time, making sure each egg is fully incorporated before adding the next. This helps maintain the batter’s smooth texture.
- Add wet ingredients: Stir in the buttermilk, pure vanilla extract, and red food coloring to the creamed mixture until combined evenly, giving the batter its signature pink color.
- Combine dry and wet mixtures: Gradually fold the dry ingredients into the wet mix, being careful not to overmix. Continue folding until the batter is smooth and consistent in texture.
- Divide and bake: Pour and evenly divide the batter between the prepared cake pans. Bake in the preheated oven for 25 to 30 minutes, or until a toothpick inserted in the center comes out clean.
- Cool the cakes: Let the cakes cool in the pans for about 10 minutes. Then, carefully transfer them to wire racks to cool completely before frosting.
- Frost the cake: Once the cakes are fully cooled, generously apply cream cheese frosting on top of one layer, place the second layer on top, and frost the surface and sides as desired.
Notes
- For best results, use room temperature ingredients to ensure smooth batter consistency.
- Adjust red food coloring quantity to reach the preferred pink shade.
- Allow cakes to cool completely before frosting to prevent melting.
- Cream cheese frosting can be homemade or store-bought for convenience.
- Store leftover cake in an airtight container in the refrigerator for up to 3 days.
Keywords: Mother’s Day cake, Pink Velvet Cake, cream cheese frosting, red velvet variation, celebration dessert, homemade cake