Cheesy Taco Sticks Recipe
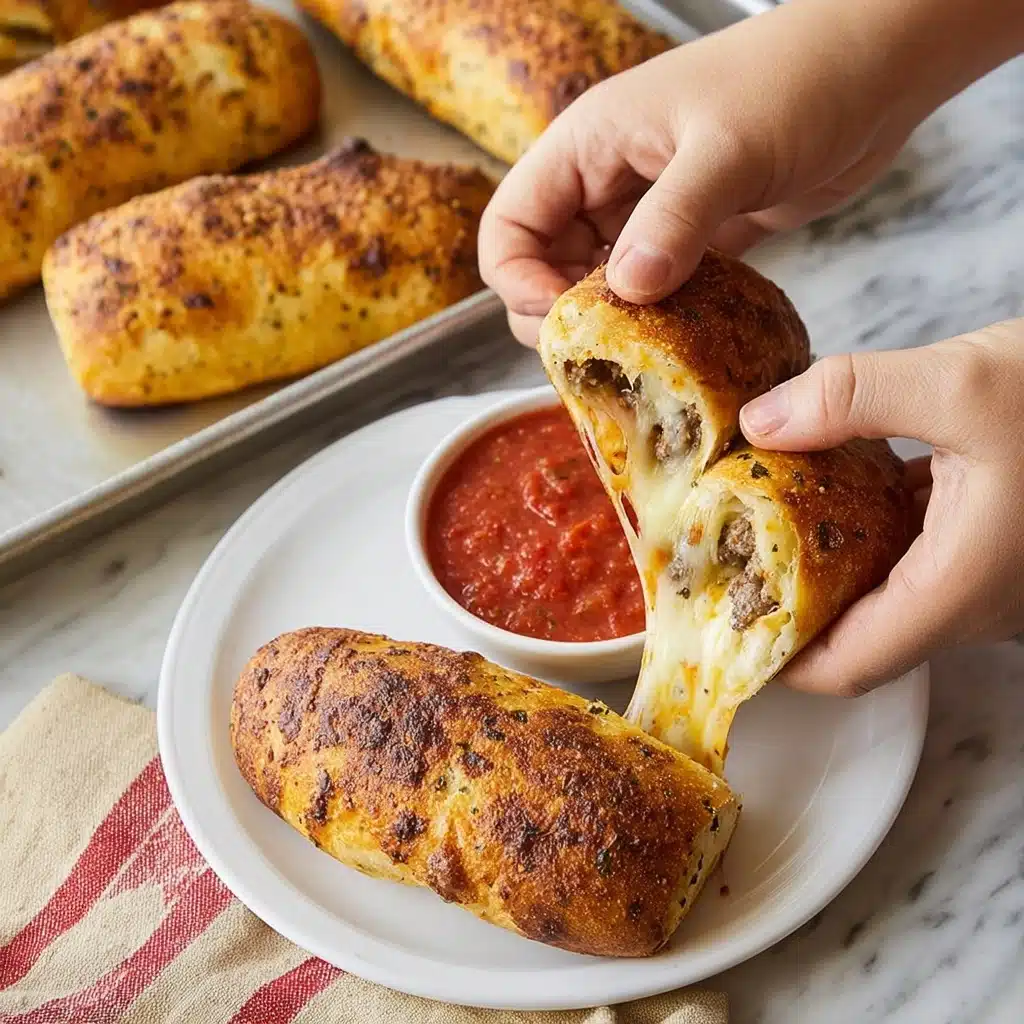
There is something incredibly satisfying about pulling golden, cheesy, and flavorful treats straight from the oven, and that’s exactly what Cheesy Taco Sticks bring to your kitchen. These delightful twists combine the bold spices of seasoned ground beef with the gooey goodness of melted cheddar and mozzarella, all wrapped up in soft yet crispy pizza dough. Whether you’re craving a fun appetizer, a party snack, or a quick dinner, Cheesy Taco Sticks are guaranteed to impress with their irresistible charm and delicious layers of flavor.
Ingredients You’ll Need
Getting started with Cheesy Taco Sticks is a breeze because each ingredient plays a crucial role in delivering that perfect balance of taste, texture, and color. From the savory ground beef to the blend of cheeses, everything is designed to create mouthwatering results.
- Refrigerated pizza dough: Provides the tender and chewy base that crisps up beautifully when baked.
- Ground beef: Adds hearty richness and is the main protein that carries the taco flavors.
- Taco seasoning packet: Infuses the beef with smoky, spicy, and aromatic notes essential for that classic taco taste.
- Shredded cheddar cheese: Brings sharp, tangy flavor and melts into molten goodness.
- Shredded mozzarella cheese: Offers a creamy, stretchy texture that complements cheddar perfectly.
- Butter (melted): Used to brush the sticks for a golden finish and a touch of richness.
- Garlic powder: Sprinkled on top for an extra hit of savory depth.
- Salsa and sour cream: The classic dipping duo that adds brightness and cooling contrast.
How to Make Cheesy Taco Sticks
Step 1: Cook the Taco-Seasoned Beef
Start by browning your ground beef in a skillet over medium heat. Once it’s cooked through and nicely crumbly, drain off any excess fat to keep flavors clean and rich. Stir in your taco seasoning along with a bit of water or as directed on the packet to let the spices fully marry with the meat. Set this savory filling aside while you roll out your dough.
Step 2: Prepare the Dough and Add the Filling
On a lightly floured surface, roll out the refrigerated pizza dough into a large rectangle. This creates the stage where your delicious Cheesy Taco Sticks will come together. Spread the cooked taco beef evenly over half of the dough so every bite is packed with flavor. Then, generously sprinkle both cheddar and mozzarella cheeses over the meat, ensuring a perfect cheese-to-meat ratio for gooey, satisfying bites.
Step 3: Fold and Cut the Dough
Fold the plain side of your dough over the filling, pressing the edges firmly to seal in all that goodness. This step is important to prevent any filling from escaping during baking. Use a sharp knife or pizza cutter to slice the dough into approximately 1-inch-wide strips. These will become your signature cheesy twists.
Step 4: Twist and Prepare for Baking
Take each strip and give it a gentle twist to reveal the cheesy, taco-spiced filling inside. Place these twists on a baking sheet lined with parchment paper, which helps prevent sticking and makes cleanup a breeze. Brush each Cheesy Taco Stick generously with melted butter and sprinkle a touch of garlic powder on top to enhance the aroma and add extra flavor.
Step 5: Bake and Enjoy
Pop the baking sheet into a preheated oven at 375°F (190°C) and bake for 15 to 20 minutes or until the sticks turn a gorgeous golden brown and become crisp on the outside. Once baked, let them cool slightly before serving with fresh salsa and sour cream for dipping. You’ll love how these Cheesy Taco Sticks are crunchy at the edges but tender and melty inside.
How to Serve Cheesy Taco Sticks

Garnishes
Elevate your Cheesy Taco Sticks by garnishing with freshly chopped cilantro, a tiny drizzle of lime juice, or finely diced jalapeños if you want a bit of heat. These small touches can brighten up the dish and add visual appeal, making your snack even more inviting.
Side Dishes
Pairing is key to a satisfying meal. Complement your Cheesy Taco Sticks with a fresh garden salad tossed in a light vinaigrette or serve alongside Mexican rice and refried beans for a more filling fiesta-centred spread. The warm, cheesy sticks balance nicely with these hearty or crisp sides.
Creative Ways to Present
For a party, arrange Cheesy Taco Sticks in a circular pattern around a bowl of guacamole or a layered taco dip for a festive presentation. You can also thread them on skewers for easy grab-and-go bites at casual gatherings – perfect for sharing and impressing guests without any fuss.
Make Ahead and Storage
Storing Leftovers
If you happen to have any Cheesy Taco Sticks left, store them in an airtight container in the refrigerator. They will keep well for up to 3 days and maintain their flavor if reheated properly.
Freezing
To enjoy them later, freeze unbaked Cheesy Taco Sticks on a tray until firm, then transfer them to a freezer-safe bag. Baking straight from frozen is possible; just add a few extra minutes to the baking time for the best texture and taste.
Reheating
Reheat leftovers in a toaster oven or conventional oven at 350°F (175°C) for about 8 to 10 minutes to bring back the crispiness. Avoid microwaving if you want to keep that golden crust intact, since it can make the dough soggy.
FAQs
Can I use homemade taco seasoning instead of the packet?
Absolutely! Homemade taco seasoning can add a fresh and customized flavor to your Cheesy Taco Sticks. Just adjust the amounts of spices to your taste, and you might discover your new favorite blend.
Is it possible to make these vegetarian?
Yes, swap out the ground beef for seasoned cooked lentils, black beans, or a plant-based meat alternative. The cheese, dough, and spices will still deliver that incredible taste in a vegetarian-friendly way.
What types of cheese work best here?
The combination of sharp cheddar and mild mozzarella creates a perfect balance of flavor and meltiness. However, feel free to experiment with pepper jack for some heat or Monterey Jack for a creamier texture.
Can I prepare these ahead of time and bake later?
Definitely! You can assemble the Cheesy Taco Sticks and store them in the refrigerator for several hours or overnight before baking, which makes them a great option for prepping snacks or meals in advance.
Are these sticks kid-friendly?
Most definitely. Cheesy Taco Sticks are a huge hit with kids because of their familiar taco flavors and cheesy goodness. Just adjust the spice level of the seasoning if your little ones prefer milder tastes.
Final Thoughts
There is something truly magical about Cheesy Taco Sticks that make every bite a celebration of flavor and comfort. Easy to make, irresistibly tasty, and perfect for any occasion, these cheesy twists are sure to become a beloved staple in your kitchen. Give them a try and watch how quickly they disappear from your plate!
PrintCheesy Taco Sticks Recipe

Cheesy Taco Sticks are a delicious and fun twist on traditional tacos, combining seasoned ground beef with melted cheddar and mozzarella cheese wrapped in crispy, golden pizza dough twists. Perfect as a snack or appetizer, these cheesy taco sticks are served with salsa and sour cream for dipping and are quick to prepare and bake.
- Prep Time: 10 minutes
- Cook Time: 20 minutes
- Total Time: 30 minutes
- Yield: 8 cheesy taco sticks 1x
- Category: Snack, Appetizer
- Method: Baking, Sautéing
- Cuisine: Mexican-American Fusion
- Diet: Halal
Ingredients
For the Dough and Filling
- 1 can refrigerated pizza dough
- 1/2 pound ground beef
- 1 packet taco seasoning
- 1 cup shredded cheddar cheese
- 1 cup shredded mozzarella cheese
For Topping and Serving
- 1 tablespoon butter, melted
- 1/4 teaspoon garlic powder
- Salsa for dipping
- Sour cream for dipping
Instructions
- Preheat the Oven: Preheat your oven to 375°F (190°C) to prepare for baking your cheesy taco sticks.
- Cook the Ground Beef: In a skillet over medium heat, cook the ground beef until it is fully browned. Drain any excess fat, then stir in the taco seasoning according to the packet instructions. Set the seasoned beef aside to cool slightly.
- Roll Out the Dough: On a floured surface, roll out the refrigerated pizza dough into a large rectangle for easy filling and folding.
- Assemble the Filling: Spread the cooked taco meat evenly over one half of the dough rectangle. Sprinkle the shredded cheddar and mozzarella cheeses evenly over the meat to create a cheesy layer.
- Fold and Seal: Fold the other half of the dough over the filling, pressing the edges firmly to seal the stuffed dough completely, preventing any filling from leaking out during baking.
- Cut and Twist: Cut the stuffed dough into strips about 1 inch wide. Carefully twist each strip and place them on a parchment-lined baking sheet, spacing them evenly.
- Add Butter and Garlic Powder: Brush the tops of the twisted sticks with the melted butter, then sprinkle garlic powder over them for extra flavor and a golden finish.
- Bake: Place the baking sheet in the preheated oven and bake for 15 to 20 minutes or until the sticks are golden brown and crispy on the outside.
- Serve: Remove from the oven and let cool slightly. Serve the cheesy taco sticks warm with salsa and sour cream for dipping.
Notes
- You can substitute ground beef with ground turkey or chicken for a leaner option.
- If preferred, add diced jalapeños inside for a spicy kick.
- Use low-fat cheese to reduce the calorie content.
- Make sure to seal edges well to prevent the filling from leaking during baking.
- Serve immediately for the best texture; store leftovers in an airtight container and reheat before serving.
Nutrition
- Serving Size: 1 taco stick
- Calories: 320
- Sugar: 2g
- Sodium: 560mg
- Fat: 18g
- Saturated Fat: 8g
- Unsaturated Fat: 7g
- Trans Fat: 0g
- Carbohydrates: 22g
- Fiber: 1g
- Protein: 17g
- Cholesterol: 45mg
Keywords: Cheesy taco sticks, taco appetizer, cheesy snack, pizza dough recipe, easy party food, taco twist, ground beef recipe