Small Red Velvet Cake with Mini Hearts Recipe
Introduction
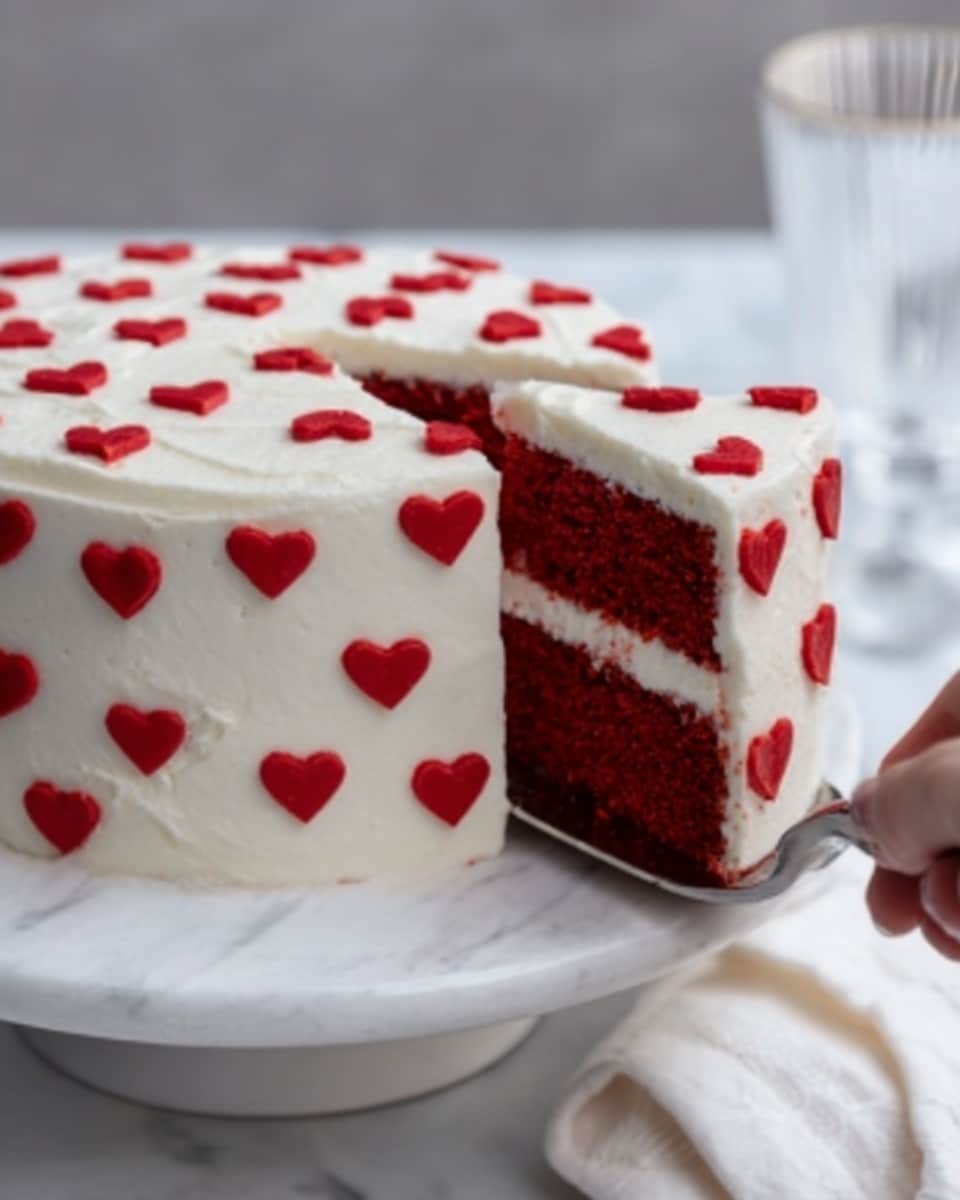
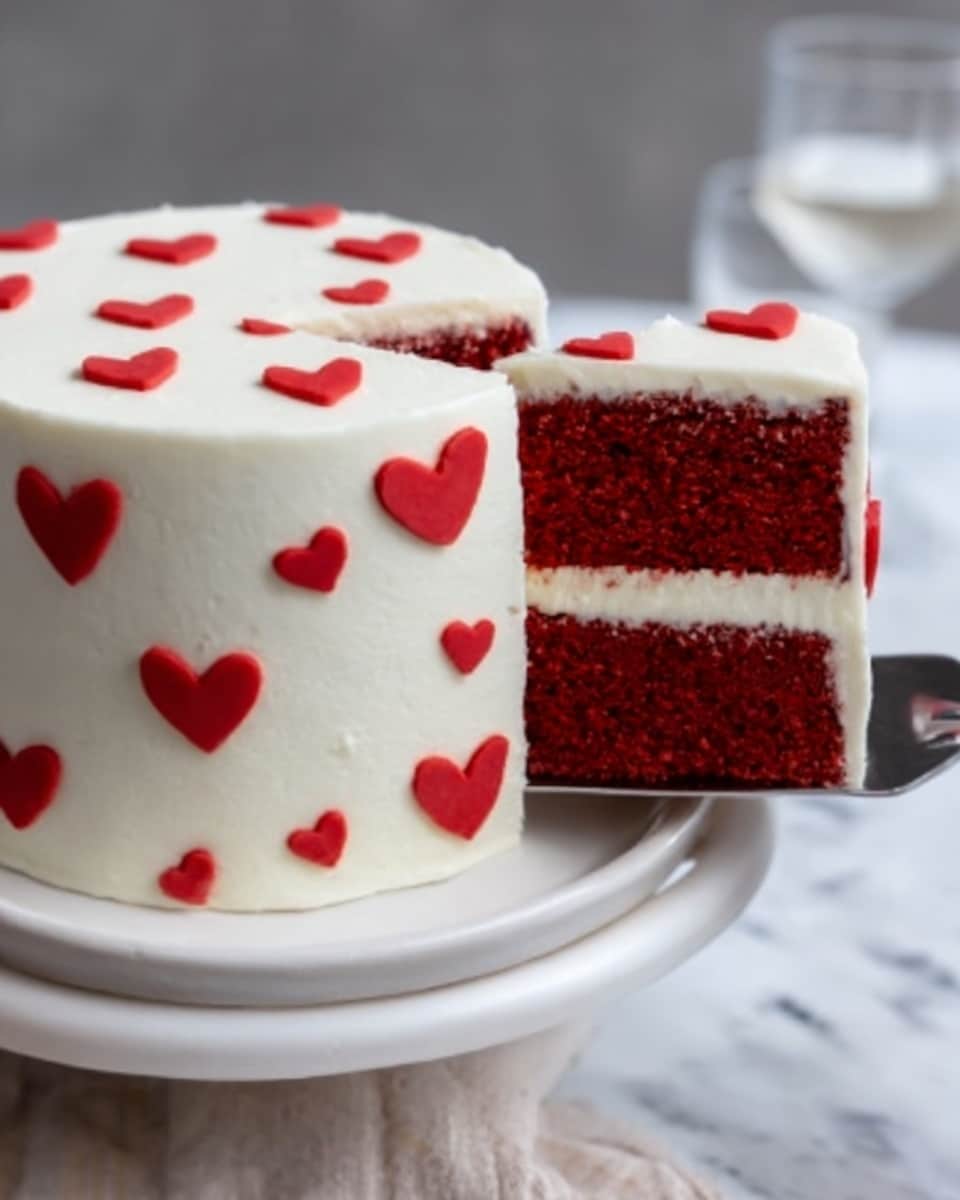
This Small Red Velvet Cake with Mini Hearts is a charming treat perfect for any special occasion. Moist, tender, and richly flavored, it pairs a classic red velvet base with creamy, fluffy cream cheese frosting. Decorating with mini red hearts makes this cake as delightful to look at as it is to eat.
Ingredients
- 1/4 cup softened butter
- 3/4 cup white sugar
- 1/3 cup vegetable oil
- 1 large room temperature egg
- 1 tsp vanilla extract
- 1 1/2 tsp white vinegar
- 1 1/4 cups all-purpose flour
- 1 tbsp unsweetened cocoa powder
- 1/2 tsp baking soda
- 1/4 tsp salt
- 1/2 cup buttermilk, room temperature
- 1 1/2 tsp red gel food coloring
- 5 oz cream cheese, softened
- 1 cup powdered sugar
- 1/2 tsp vanilla extract
- 1 1/2 cups heavy whipping cream
Instructions
- Step 1: In a large bowl, beat together the softened butter until creamy. Add the white sugar and continue beating for about 2 minutes until combined and fluffy.
- Step 2: Add the vegetable oil, room temperature egg, vanilla extract, and white vinegar. Beat again until fully incorporated.
- Step 3: In a separate small bowl, whisk together the all-purpose flour, cocoa powder, baking soda, and salt.
- Step 4: Add half of the dry ingredients to the wet ingredients and beat until combined. Pour in the buttermilk and mix fully. Then add the remaining dry ingredients and mix again.
- Step 5: Add the red gel food coloring and beat until the color is fully incorporated.
- Step 6: Pour the batter evenly into two greased and parchment-lined 6-inch cake pans. Bake in a preheated oven at 350°F (175°C) for 22–25 minutes, or until a toothpick inserted in the center comes out clean.
- Step 7: While the cake cools, prepare the cream cheese frosting. Using a hand mixer, whip the softened cream cheese, powdered sugar, and vanilla extract until smooth. In a separate bowl, whip the heavy cream until stiff peaks form. Gently fold the whipped cream into the cream cheese mixture. Reserve about 1/2 cup of frosting and dye it red.
- Step 8: Frost the cooled cakes with the cream cheese frosting. Use the red-dyed frosting to pipe mini hearts or decorate as you prefer.
Tips & Variations
- For a richer flavor, use full-fat buttermilk or add a splash of vanilla syrup to the batter.
- If you don’t have red gel food coloring, beet juice powder can be a natural alternative.
- Try adding a teaspoon of instant coffee powder to the batter to deepen the cocoa flavor.
- Use a piping bag with a small round tip to create uniform mini hearts for a polished look.
Storage
Store the cake in an airtight container in the refrigerator for up to 3 days. Before serving, let the cake sit at room temperature for about 20 minutes for the best texture. Leftover frosting can be kept in a sealed container and used within 2 days.
How to Serve
Serve this delicious recipe with your favorite sides.
FAQs
Can I make this cake dairy-free?
Yes, you can substitute the buttermilk with a plant-based milk mixed with a tablespoon of vinegar. Use dairy-free cream cheese and non-dairy whipping cream alternatives for the frosting.
How do I prevent the cake from drying out?
Be careful not to over-bake the cake. Check for doneness a few minutes before the recommended baking time by inserting a toothpick. Also, ensure the cake is well-covered or stored airtight to maintain moisture.
PrintSmall Red Velvet Cake with Mini Hearts Recipe

This small red velvet cake with mini hearts is a delightful and charming dessert perfect for a special occasion or a cozy treat. The cake features the classic red velvet flavor with a moist texture, topped with a smooth and fluffy cream cheese frosting. The decorative mini red hearts add a cute and festive touch to the cake, making it both visually appealing and delicious.
- Prep Time: 20 minutes
- Cook Time: 25 minutes
- Total Time: 45 minutes
- Yield: Two 6-inch cakes (around 6–8 servings) 1x
- Category: Dessert
- Method: Baking
- Cuisine: American
Ingredients
For the Red Velvet Cake:
- 1/4 cup softened butter
- 3/4 cup white sugar
- 1/3 cup vegetable oil
- 1 large room temperature egg
- 1 tsp vanilla extract
- 1 1/2 tsp white vinegar
- 1 1/4 cups all-purpose flour
- 1 Tbsp unsweetened cocoa powder
- 1/2 tsp baking soda
- 1/4 tsp salt
- 1/2 cup buttermilk, room temperature
- 1 1/2 tsp red gel food coloring
For the Cream Cheese Frosting:
- 5 oz cream cheese, softened
- 1 cup powdered sugar
- 1/2 tsp vanilla extract
- 1 1/2 cups heavy whipping cream
Instructions
- Beat butter and sugar: In a large bowl, beat together 1/4 cup softened butter until creamy. Once the butter is fluffed up, add in 3/4 cup white sugar. Beat together for about 2 minutes until well combined.
- Add wet ingredients: Add 1/3 cup vegetable oil, 1 large room temperature egg, 1 tsp vanilla extract, and 1 1/2 tsp white vinegar to the butter mixture. Beat until everything is fully incorporated and uniform.
- Whisk dry ingredients: In a separate small bowl, whisk together 1 1/4 cups all-purpose flour, 1 Tbsp unsweetened cocoa powder, 1/2 tsp baking soda, and 1/4 tsp salt until evenly combined.
- Combine wet and dry ingredients: Add about half of the dry ingredients to the wet ingredients and beat until combined. Pour in 1/2 cup buttermilk and mix fully. Finally, add the remaining dry ingredients and beat again until smooth.
- Add food coloring: Incorporate 1 1/2 tsp red gel food coloring into the batter. Beat until the red color is evenly distributed throughout the batter.
- Bake the cake: Evenly pour the batter into two greased and parchment-lined 6-inch cake pans. Bake in a preheated oven at 350°F (175°C) for 22 to 25 minutes, or until a toothpick inserted into the center comes out clean. Remove from oven and allow to cool completely.
- Make cream cheese frosting: While the cakes cool, whip together 5 oz softened cream cheese, 1 cup powdered sugar, and 1/2 tsp vanilla extract in a medium bowl using a hand mixer. In a separate bowl, whip 1 1/2 cups heavy whipping cream until stiff peaks form. Gently fold the whipped cream into the cream cheese mixture until fully combined. Reserve about 1/2 cup of frosting and tint it red for decoration.
- Frost and decorate: Spread the cream cheese frosting evenly over the cooled cakes. Using the reserved red-tinted frosting, pipe mini red hearts or decorate as desired. Serve and enjoy!
Notes
- Ensure all ingredients like eggs and buttermilk are at room temperature for easier mixing and better texture.
- Do not overmix the batter once the flour is added to keep the cake tender.
- Make sure cakes are completely cooled before frosting to avoid melting the frosting.
- You can substitute the red gel food coloring with natural alternatives like beetroot powder for a natural color.
- This recipe is perfect for small gatherings due to its 6-inch cakes; double the ingredients for larger cakes if needed.
Keywords: Red velvet cake, cream cheese frosting, mini heart decoration, small cake recipe, Valentine’s Day dessert